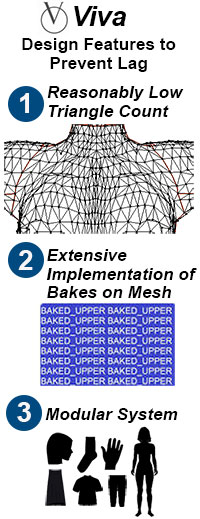
Viva Support: Modular System (Level 3)
One of the problems that any virtual world like Second Life faces is "lag," a sort catch-all that describes when the world slows or grinds to a halt. There are number of factors which cause it, but lag has been exacerbated by the introduction of mesh avatars. Thus, responsible mesh developers need to work towards minimizing their avatar's impact on the virtual world as much as possible. I've taken that to heart, and you'll find built into Viva three main design features to help in this regard.
Many mesh avatars are pre-built with all parts wrapped into one package, but Viva's Modular System allow you to build an avatar with just the parts that you need. It provides you flexibility. You can add or remove parts as your tastes and needs change. In your package, you'll find a "Modular System" subfolder. Open it and you'll find all the various modular parts that come with Viva.  Here's how to use the modular parts to build an avatar . . . Here's how to use the modular parts to build an avatar . . .
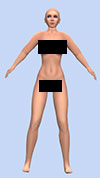
First, remove any attachments from your avatar. • Look in the folder and "Wear" the "Alpha: Primary." Your body will disappear and
• In the folder and you'll find "Mesh Body (Viva) - Body Only." Wear it. Now
•
• And . . . wear the Hands.
Voilà! This is your starting point: a basic mesh avatar. Leave Out Those Parts You Don't Use Once you have the basic mesh avatar, you can add whatever is needed. If your neck area has been looking good without turning on the Neck Fix, then you can leave that out. If you don't use the Areola or Nipple mesh, there's no sense including those. More details on the Neck Fix found: here. What About Layers?
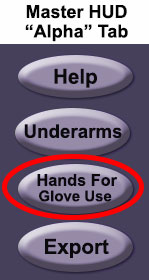
Because they are smaller, the skin of the hands will show through without the use of an Alpha. To handle this situation, you'll find a special button in the "Alpha Selections" component of the Master HUD: "Hands for Glove Use." When using the Elegant gloves, be sure to click this button. Keeping all Parts in One SystemIf you are moving back and forth between Bakes on Mesh and Non-Bakes on Mesh, try to keep all the parts in one system. Viva can get confused if you assemble some parts that BoM enabled and some that are not. Nothing bad will happen. You can get all parts coordinated to the same system by turning BoM and off a couple of times.
But, be aware, when you do have a mix of the two, and when switching BoM off, you are likely to lose skin and clothing textures, ending up with a white avatar. If that happens, it's easily rectified. You just need to re-apply the skin and any layer clothing missing. This only happens when turning Bakes on Mesh off. The loss of skin and clothing will not occur when BoM is turned on. That's because the BoM system picks up its wearables from your inventory, and Second Life always displays a wearable skin from the inventory. The "white" avatar only happens at times when BoM is turned off. 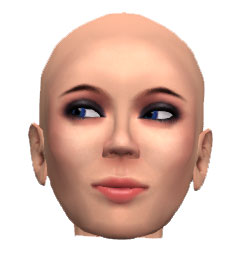 Bento Heads Bento Heads
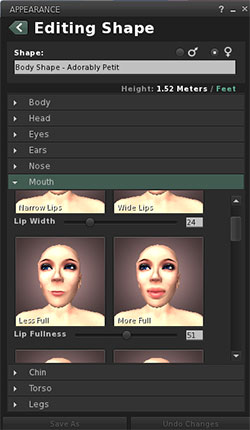
There are two Bento Heads in the Modular System subfolder. The Bento Head that you will probably use the most is named as "BoM Enabled." It has the advantage of accepting cosmetics and make-up the same way the system head does (by using wearable tattoos from the inventory). While the skin tone of the system head can not be tweaked, it is possible to change the skin tone of the Bento head. (Color adjustments to skin are made from the Skin component.) As the color of the BoM body is changed, the head changes with it. Be aware that if you do change skin color of the BoM body and head, an additional BoM layer will be needed for clothing. For information on how that is done, see: BoM Tutorial It should be pointed out that you do not need an alpha for the BoM enabled Bento head. As soon as it is worn, the head will automatically replace the system head. That's why the primary alpha (which doesn't mask the head) works fine with the BoM enabled head. You'll also find "Special Use Head - Bento Mesh (NOT BoM Enabled)" in the Modular System subfolder. Mostly, it is useful if are not using Bakes on Mesh and you need to tweak your skin color. This head will receive the same color information as the rest of the body does, so the head and body will be coordinated. Do You Need to Use a Bento Head?Many people use Second Life's system head with fair to good results. Even though it was created several years ago, it is amazingly well constructed and aesthetically pleasing. Make-up can be applied easily to the head using tattoo wearables. And it works perfectly with the Appearance sliders. (Appearance Sliders appear when you right click on your avatar and select "Edit my Shape." They are very useful in getting just the right look with facial features, allowing you to change things like head size, lip fullness, etc. More information: Shapes.) You should be aware that when using Appearance Sliders such lip fullness, head shape, etc., Bento heads behave differently than when the same adjustments are made on the system head. That's because the Appearance sliders for a Bento head use a different system to make those adjustments. Moreover, there is another factor plays a role in the difference between the two, and that is the way the Bento head may have been sculpted by the creator. Because of the differences, I have provided a series of shapes which you can use to help you make the transition between system and Bento. One set of shapes is designed for the Viva body with a system head. The other set of shapes is designed for the Viva body with the Bento head. While I tried to obtain a close match, you will see a difference in facial features of those shapes with the same name. Nevertheless, they provide you with something to work with. The shapes are found in the "Shapes for Mesh Body" sub folder. Feel free to use them as is. Or use them as a starting shape and modify as needed. More information on shapes is found here. Underwear LayerThere are two underwear layers: regular and special. The difference between the two lies in how the top of the layer is cut. The regular Underwear Layer is cut a little shorter than the special. Primarily, this is done to allow room for the Neck Fix. If the top of the underwear layer and the neck fix overlapped, the two would conflict with one another, and the Neck Fix might even lose its partially transparent edges which allows it to blend the junction between the head and upper body. The lower cut is the most common approach to underwear and clothing layers employed by mesh creators, and if you use a neck fix, then the "regular" is the one that you want to use. More information on: Layers. Underwear Layer (Special: For Clothing Utilizing a Full Neck)Use this layer if you don't need to use the Neck Fix. This layer is cut higher and allows for clothing items to have a bit more room height wise in the neck area. Clothing Layer and Clothing Layer (Special)Same distinction as Underwear. See the description above. Nipple and Areola Mesh Options 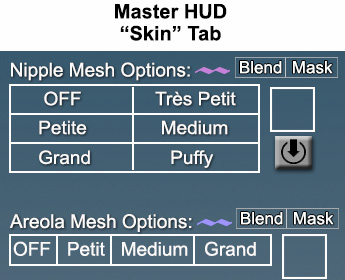
Whether you use nipple and areola mesh is totally up to you. You can try them out with the "fully assembled" body. They are turned on in the "Skin" portion of the Master HUD. Here's a little hint: they actually work better in the modular system than in the "fully assembled" body. You'll see that on the "Skin" component screen that you have a choice between configuring them for Alpha Masking or Alpha Blending. In the modular system, you are more apt to be able to use Alpha Blending which allows them to nicely blend in with the body skin. With Alpha Masking, however, you don't get the blending effort. It's more of defined edge. Alpha Masking is typically required in the fully assembled body because of its full compliment of layers. More information: Here One last note. It is possible to change the texture of the areola and nipples. That's done with the "Chest Area" Applier found in the the Notecard Applier subfolder. Skirt
Second Life has the ability to save an outfit. An outfit consists of everything that you are wearing including clothing, the mesh body, and any attachments. You save an outfit by right clicking on your avatar and selecting either "Appearance" or "Edit Outfit." It's a very convenient feature since you can wear one outfit, switch to another and then back again without re-create each. The items which make up a saved outfit are not actual copies, but rather they are links to items scattered about in your inventory. Included in those links is a link to the Viva mesh body. But if the link went to the body in Viva's Main Folder, you would always end up with a different set of body characteristics. Your body in the Main Folder is always changing. You might use a light skin one day and a darker one the next day. Or you may use Bakes on Mesh (BoM) for one outfit and Non-BoM for another.
You don't necessarily need to place the copied parts in the Western Jean folder. You can create one or more shared folders that hold the copied parts. If most of your informal clothing can use the same body that you used for Western Jeans, it makes sense to use a shared folder. Once you have the shared folder sorted out, do the following:
If you follow the steps above, the links for the resulting outfit will go the shared folder and the body will always appear as you have set it up. This is something that is not limited to Viva. All owners mesh avatars need to keep this in mind when saving outfits. It takes a bit more time getting things set up, but once you have a system established, having the convenience of being able to select and wear outfits is time well spent. Links to Help Support | Viva Forum | Creator's Information | Comparison Chart of the 3 Levels |
 The Modular System
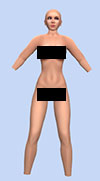
 Wear the Feet
 There are two types of gloves in the Modular System folder. One is a "regular" set of gloves
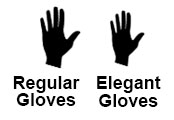

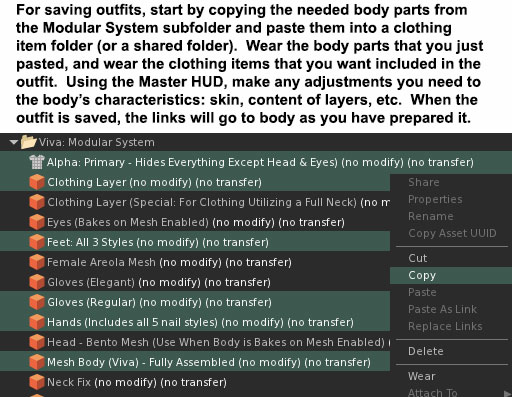 For outfit purposes, you need a copy of the body (and its modular parts) that don't change. The way to assure that the body you use for the outfit doesn't change is make a copy of it. For example, let's say you want to save an outfit for Western Jeans and a T-shirt. To do that, you would copy the body and its various modular parts and place them in the Western Jeans folder.